Attribute based queries of raster layers are quite different than attribute based queries of vector layers. You are still asking the fundamental question, “What locations have a specific attribute or combination of attributes?” However, to perform an attribute based query of a raster layer it is necessary to perform one of the most fundamental raster based analysis operations, reclassification. This tutorial covers the process of doing a reclassification on both the DEM_092G and an aspect raster map layers.

Activity 1: Reclassify a DEM
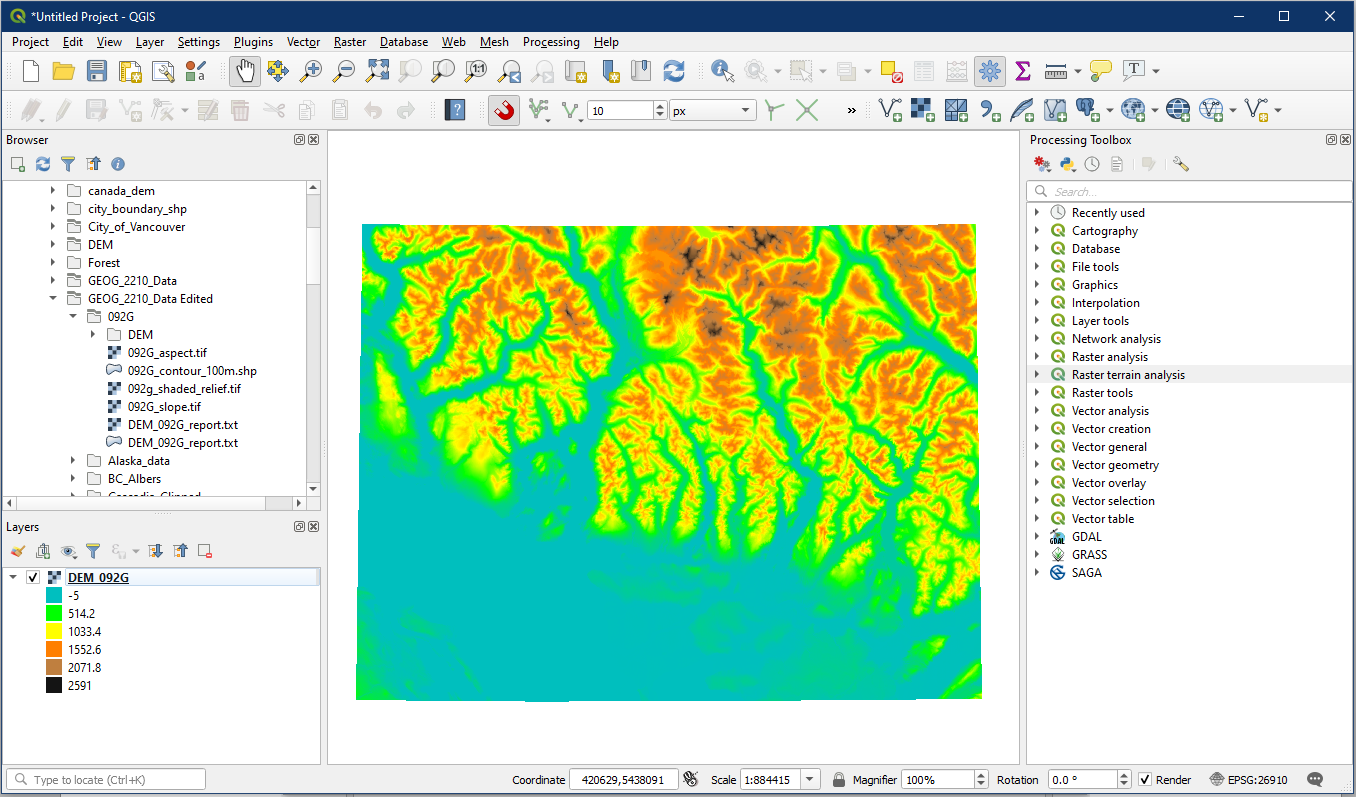
Vancouver is a very low-lying area and some of the elevations classified by the DEM lie below sea level; moreover, the ability to clearly see the ocean is difficult using a continuous palette. As a result we may want to eliminate or not show some elevations. This is a method of achieving those means using a reclassification technique. When reclassifying, we are recreating classes using a set of rules. “Null” means that it will not be expressed, “thru” is a method of stating a range of values. When reclassifying it is always best to examine the min, max, and distribution of values within a layer.
Open a new QGIS project and load the DEM_092G raster layer. The layer should be black and white by default, so change the colour based on tutorial 10 (Quantitative Raster Data section), but for Mode choose Continuous instead of Quantile.
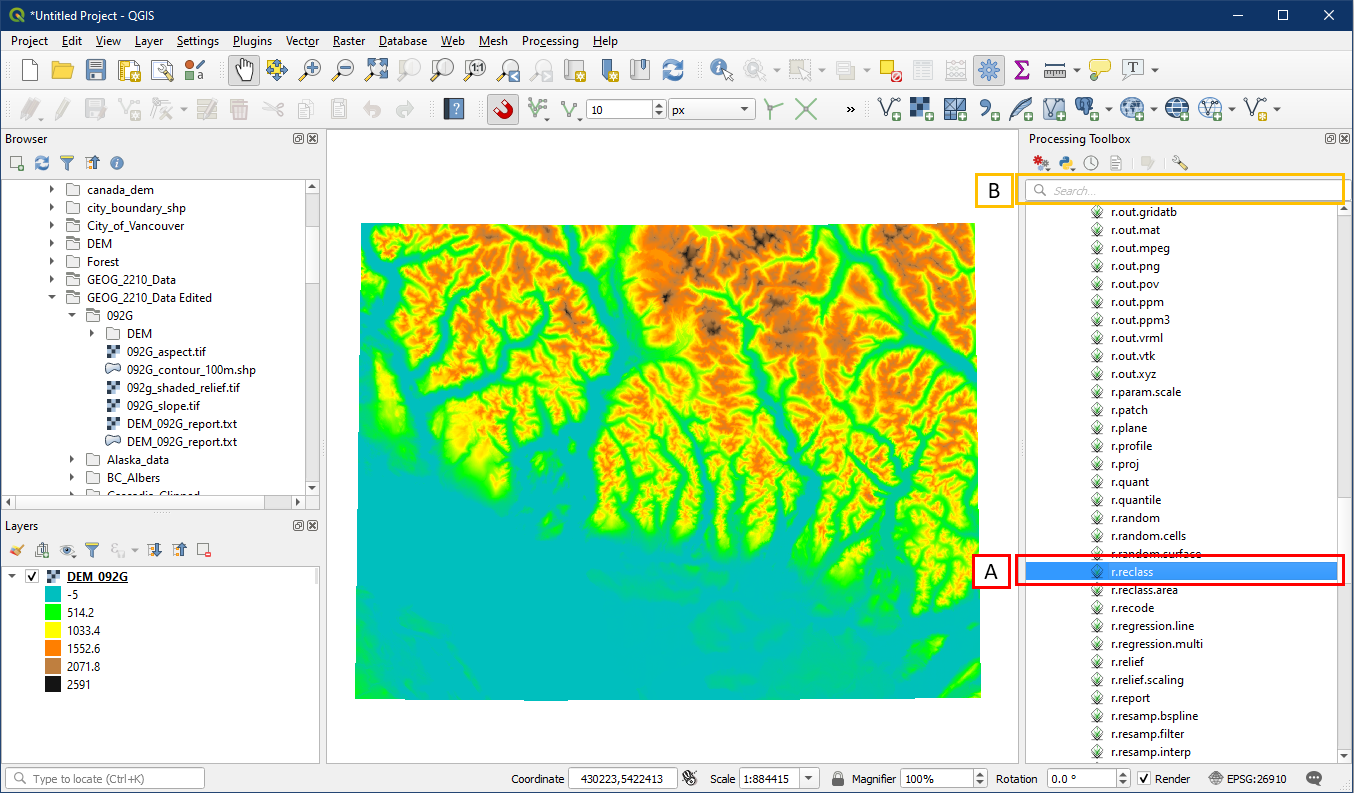
In the Processing Toolbox, go to GRASS > Raster > r.reclass (A). Alternatively, search for “r.reclass” in the search box (B).
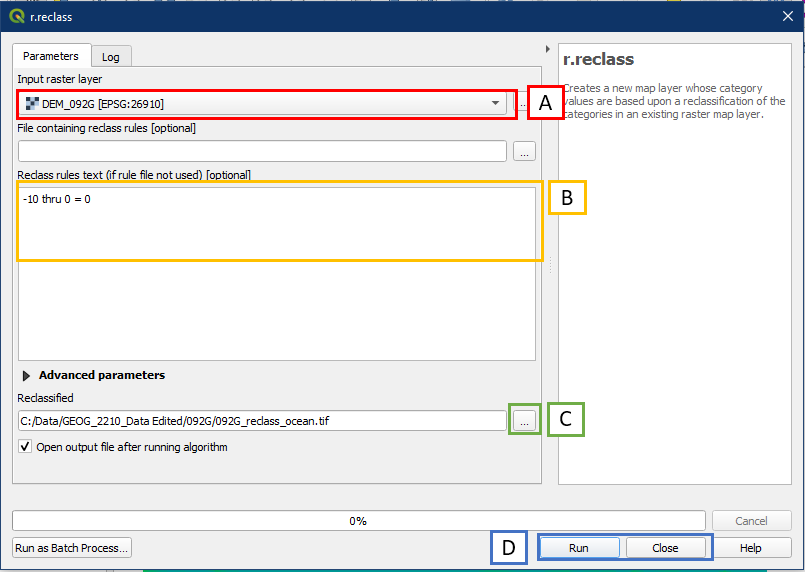
In the r.reclass dialog window, set the following settings:
- For Input raster layer choose DEM_092G
- In the reclass rules text box enter:
- -10 thru 0 = 0
- Click the “…” button to Save to File, choose a folder location and file name for the reclassified layer. Call it 092G_reclass_ocean
- Click Run, and Click when it is done.
The reclassification rule we entered in the previous step produced a new layer that turned all of the values below sea level into a new raster layer with a value of 0, and left the areas higher than sea level as null (blank). Turn off the DEM_092G layer and notice that the new reclassified layer covers all of the coastal areas and is null (blank) on the land areas.

Activity 2: Reclassify an Aspect layer
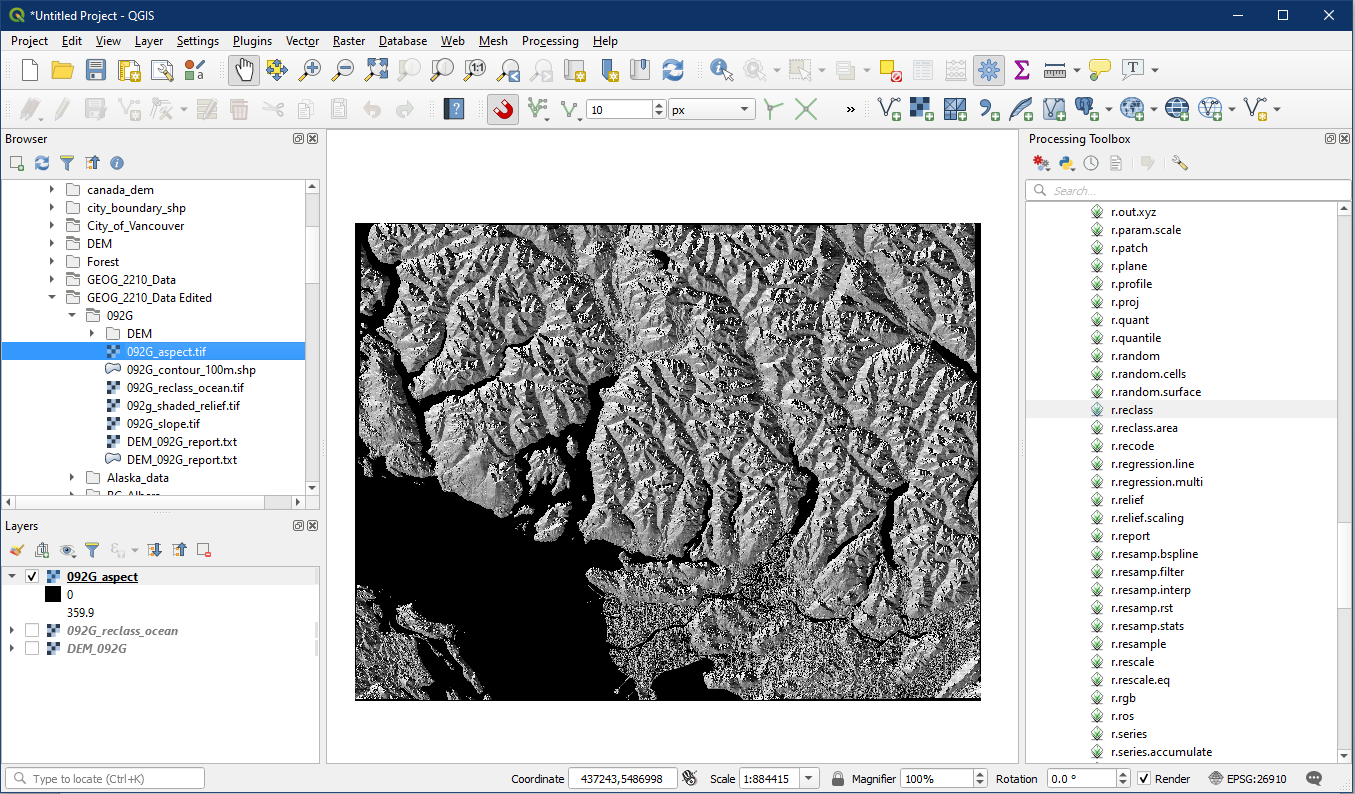
In this example let’s pretend that we are interested in evaluating potential solar panel sites on the slopes surrounding Vancouver. We know that we cannot install solar panels on a north aspect, and that the best aspects are from East-South-East (112.5°) to West-South-West (247.5°).
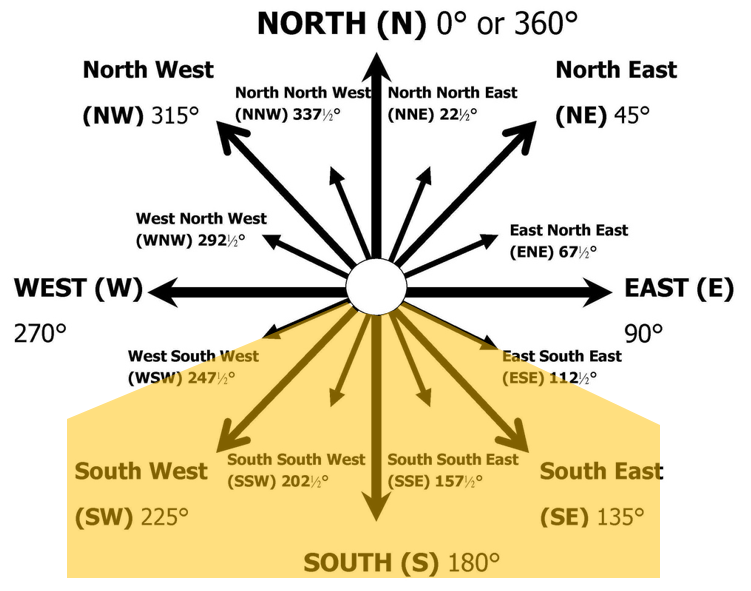
Add the Aspect layer you created in Tutorial 17 to the layer panel. Recall that is has values ranging from 0 to 360 degrees. We want to create a new layer containing only areas that are between 112.5° and 247.5°.
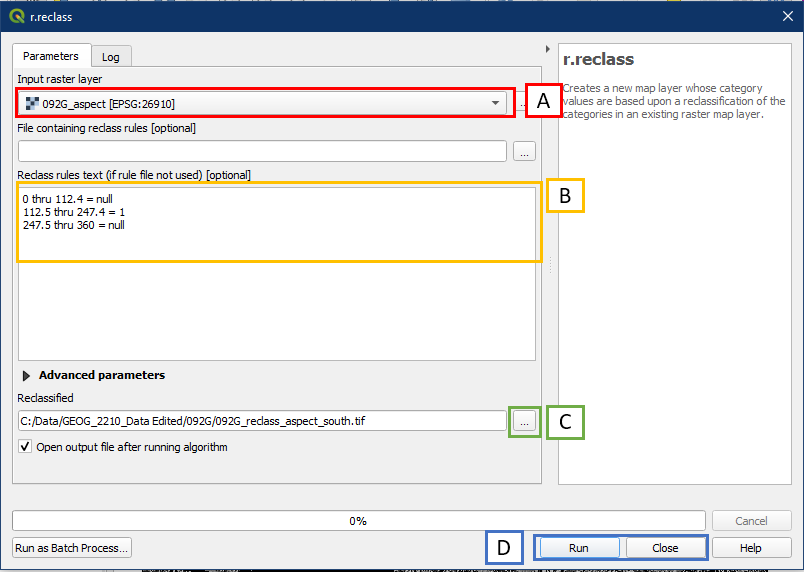
Open the r.reclass tool again and input the following settings.
- For Input raster layer select your Aspect raster layer
- In the Reclass rules text box enter the following:
- 0 thru 112.4 = null
- 112.5 thru 247.4 = 1
- 247.5 thru 360 = null
- Click the “…” button to Save to File, choose a folder location and file name for the new reclassified layer
- Click Run, and Click when it is complete
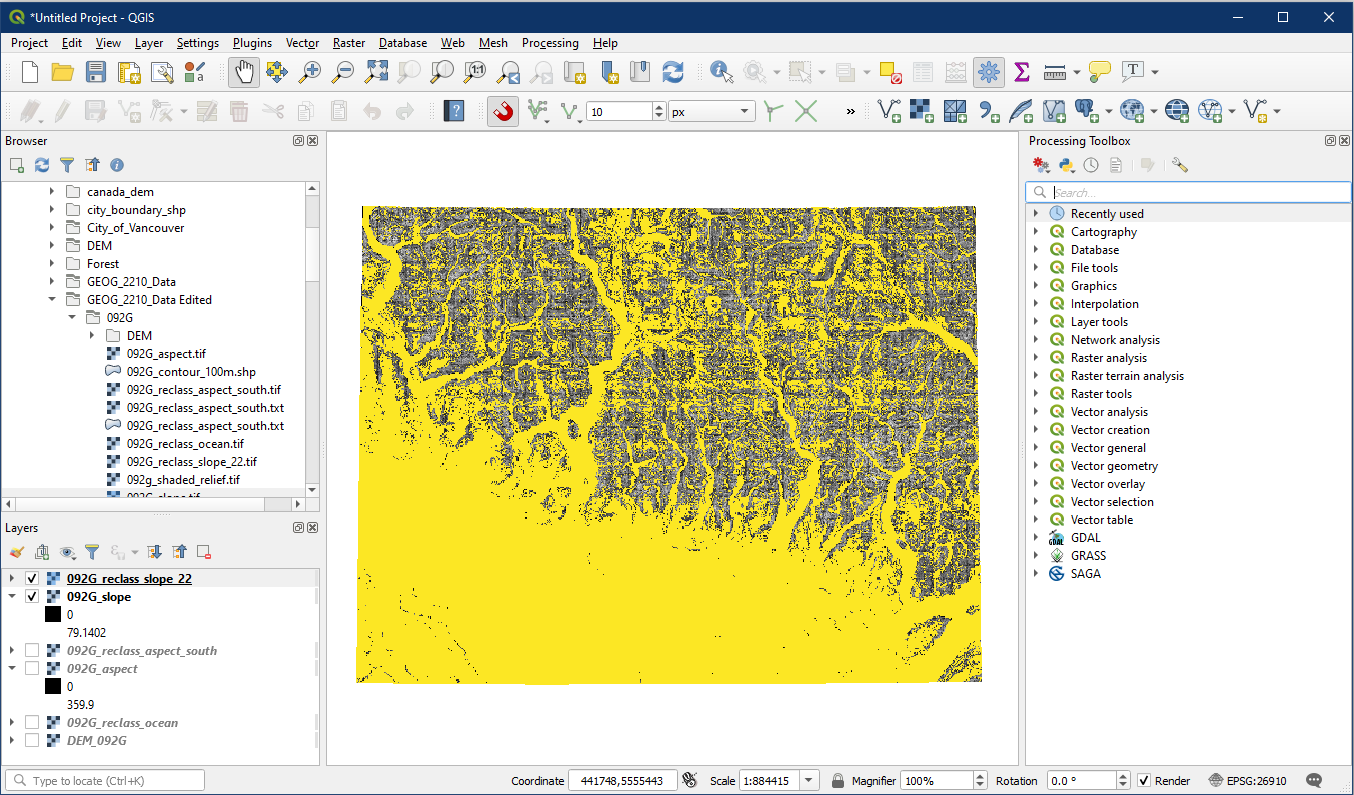
If the new layer is not already on top, drag the layer to the top of the within the layer panel to visualize it. Notice how the areas that appear to be south-facing mountain sides are displayed using the reclassified layer. The reclassified south-facing area will have a value of 1 in this layer.

Run the r.report tool (from tutorial 17) on this reclassified raster layer and we can find some useful information. Since we reclassified the south-facing areas with a value of 1, we can easily tell that the area with south-facing slopes (A). We can also see the total area covered by this raster layer extent (B).

Activity 3: Reclassify a Slope Layer
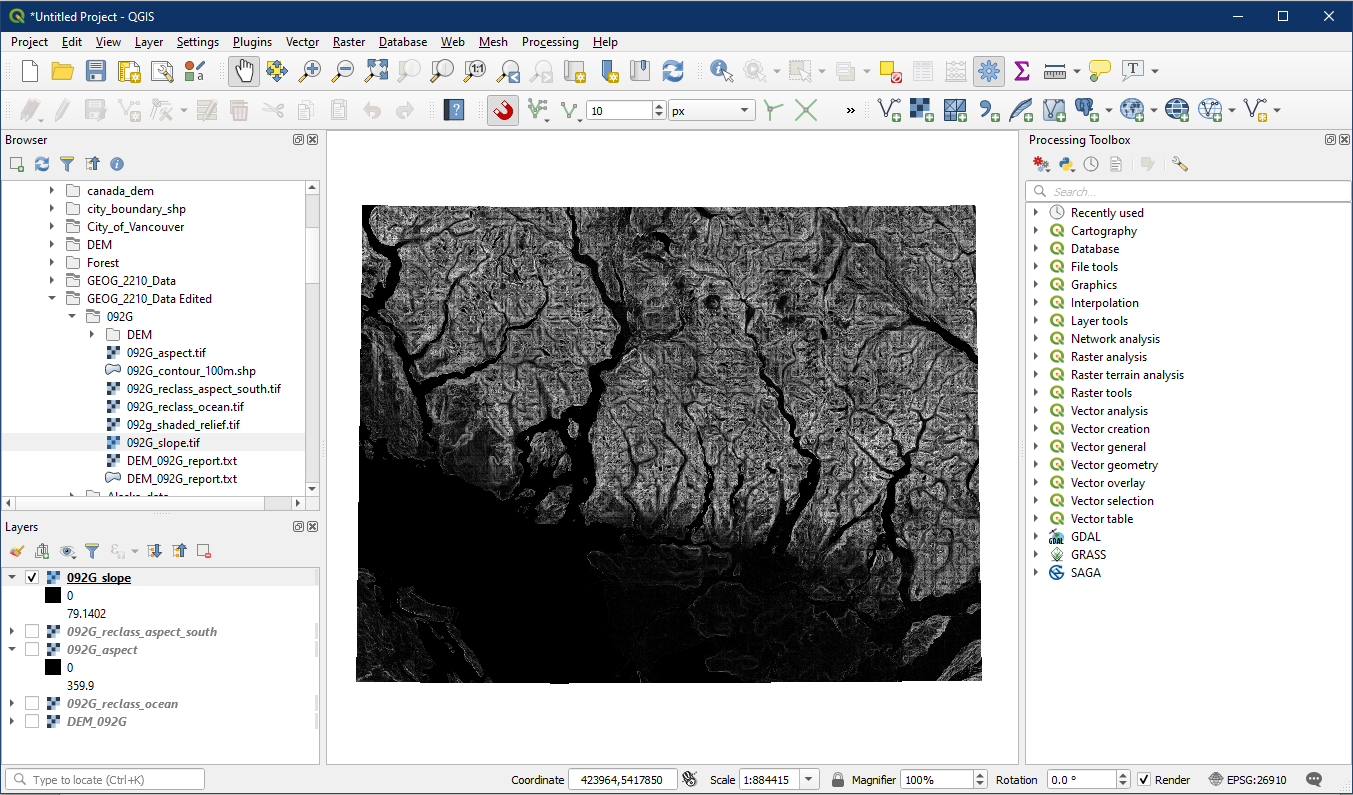
Continuing with the example of evaluating potential solar panel sites on the slopes surrounding Vancouver. We know that we cannot install solar panels on a slope greater than 22°, thus we only want to keep slopes less than 22°.

Add the Slope layer you created in Tutorial 17.
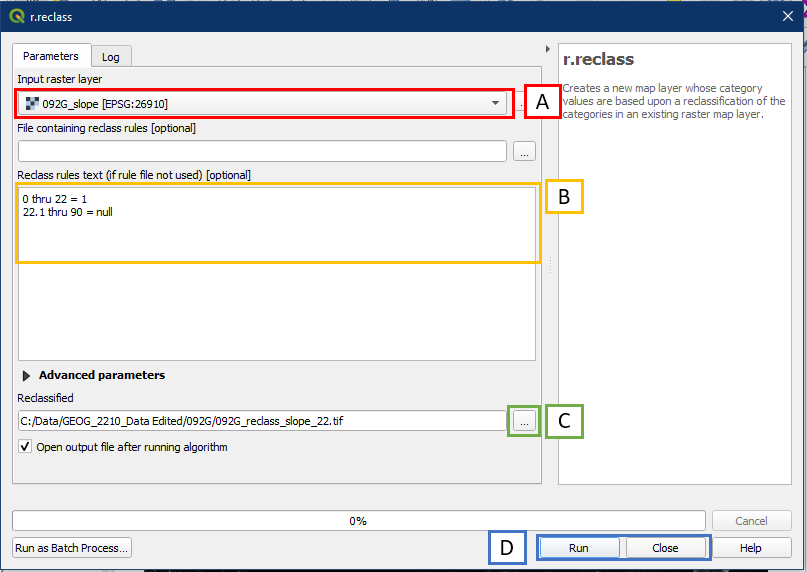
Open the r.reclass tool again. This time enter the following settings.
- For Input raster layer choose your Slope layer
- In the Reclass rules text box enter:
- 0 thru 22 = 1
- 22.1 thru 90 = null
- Click “…” to Save to File, select a folder location and file name for the new reclassified layer
- Click Run. Close the window when finished
The reclassified slope layer will have a value of 1 for areas that had a slope of 0° to 22° in the original slope layer.
Run an r.report on the layer and we can find the area with slope less than 22° (A). Also note that the total raster area is the same as the aspect report, since the raster layers all have the same extent.

Activity 4: Raster Calculator
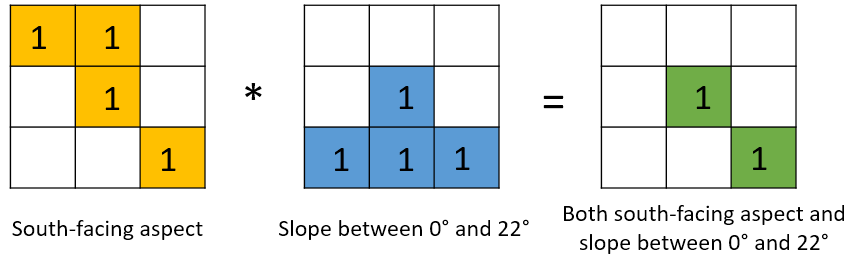
In order to see what amount of area is suitable for solar panel installation, we need to determine the amount of south-facing aspect and slopes between 0° to 22°. To do so we will use the Raster Calculator to multiply the two layers. We multiply the two layers areas that have a value of 1 in both input layers will result in a value of 1 in the output layer (1*1 = 1). But if the same pixel area has null value in either layer, the resulting layer will be null as well (1 * null = null).
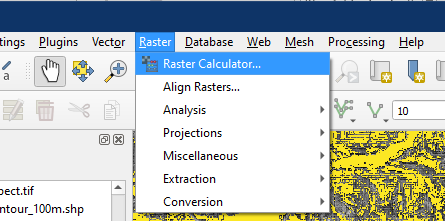
Click the Raster menu button > Raster Calculator.
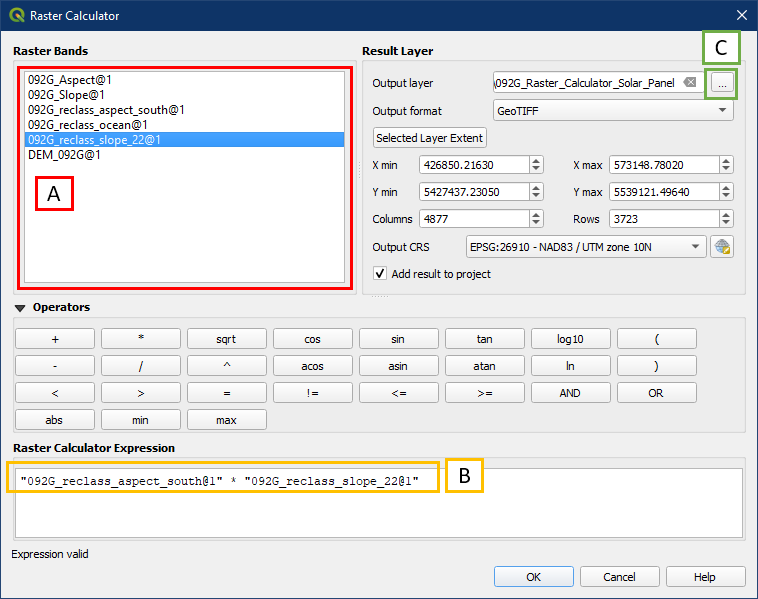
In the Raster Calculator:
- Double click the layers in the Raster Bands box to add them to the Raster Calculator Expression area (B)
- In the Raster Calculator Expression area, create an expression in the form of “Layer 1” * “Layer 2”
- Click the “…” button to choose a folder location and file name for the new raster layer. Click OK
The resulting layer will contain areas that are both south-facing aspect and has slope between 0° and 22°.

Run the r.report tool on this layer and have a look at the information. Notice that the area with a value of 1 should be smaller than both the reclassified slope and aspect layers, since only areas they have in common are displayed here.

Great work. Save your project as Tutorial_18.