Bounding Boxes
In this part tutorial you will learn how to edit a polygon to create a bounding box. Bounding boxes in QGIS are polygons that are used to clip layers. They aid in the optimization and performance of the software by limiting the spatial extent of the layers displayed.
“Bounding boxes are crucial for a lot of geospatial projects: whether you need to limit the extent of your web mapping application or need to cut your research data to the area of interest, bounding boxes are used everywhere.” (Daniel, 2017)
Imagine that you are only interested in displaying a region of the world (Pacific Northwest) versus the entire world. Every time you load a layer in the World Lat Long folder you will be rendering the entire world’s data. This is cumbersome if you have many layers, and will slow the rendering process. Moreover, if you have a many raster files with high resolution it can cause instability issues (QGIS software crashes).
If you want to digitize it will become even more unstable. If you want to change projections it becomes unstable or some layers (more specifically raster) are often not transformed due to constraints. So based upon this Bounding Boxes are a preferable way of displaying geographical information.
Now let’s create a scenario. Imagine you have been tasked with creating a map of the Cascadia bio-region, and asked to represent the population and road networks of this region. You could just display the region in the map viewer, however, you may run into issues of efficiency (see previous discussion). Instead you decide to create a separate set of layers that only focus on Cascadia bio-region. Let’s do that by creating a bounding box around Cascadia and then clipping this area out of the World layers.
A quick Google search leads to this website – Cascadia , and some more reading provides the following with a sample map:

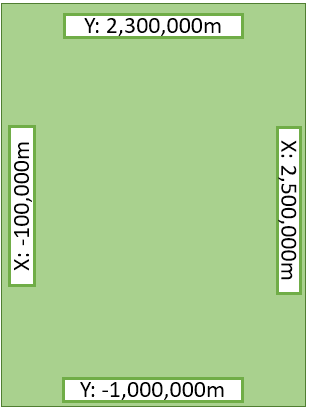
Since Cascadia is centred on the province of BC and the adjacent American coastal states, BC Albers would be a good projection to use for our map. We also have reprojected BC Albers layers from previous tutorials. The approximate extents of the Cascadia region in the BC Albers projection is shown below. We will base our bounding box on these extents.
Activity 3: Bounding Boxes
Open a new project. In the Browser panel locate one of our reprojected BC Albers province layer, Provinces_3005 and add it to the map. Ensure that the project CRS in the lower right is BC Albers (EPSG:3005).

We will now create a new layer for our bounding box. Select Layer > Create Layer > New Shapefile Layer.

In the New Shapefile Layer window, set the following:
- Use the “…” button to choose a folder and file name for the new layer. For example create a new folder called Cascadia_Clipped, and call the new layer Cascadia_Bounding_Box, with shapefile format (.shp)
- Set the Geometry Type to Polygon
- Ensure the CRS is set to BC Albers (EPSG:3005)
- No need to create any fields. Click OK

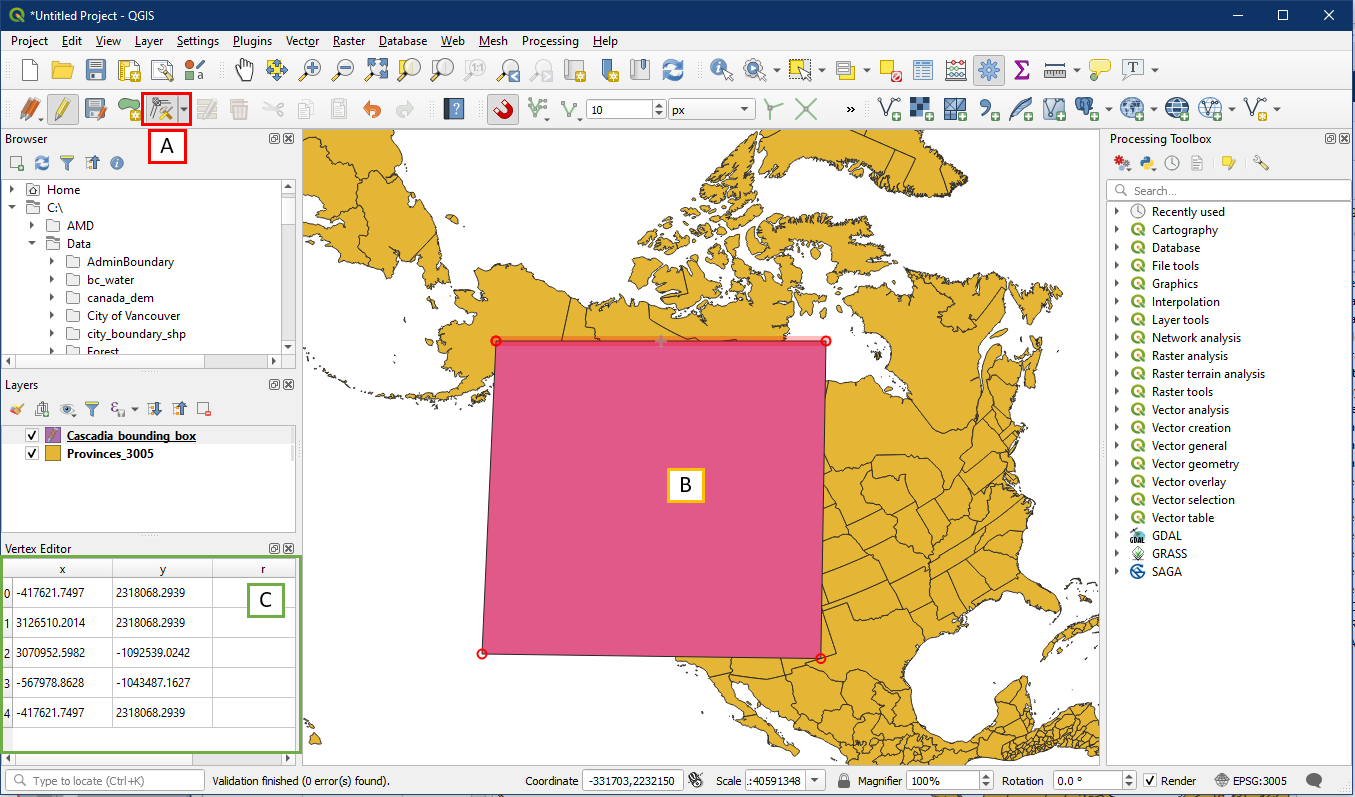
The new layer will be blank. With this layer selected in the Layers panel, toggle on editing (A), and select the Add Polygon Feature button (B). Draw a simple box on the map that roughly covers Cascadia by left clicking four points on the map and then right clicking to complete (C). It doesn’t need to be exact, since we will be editing this box next.

With editing still on, select the Vertex Tool (A). Now hover your mouse over the bounding box polygon and right click on it (B). Doing this will open the Vertex Editor pane (C). Note how even though the box is a square, there are 5 records in the Vertex Editor window. This is because the first and last point are the same, in order to have a closed polygon.
Recall the extents for Cascadia shown in the beginning. We can use the extents to find the coordinates for our bounding box. For example the top extent is 2,300,000m and the left extent is -100,000m, which means the top left corner of the bounding box has the XY coordinate of X: -100,000m and Y: 2,300,000m.

We will now edit the X and Y coordinates within the Vertex Editor so that our bounding box will have the proper extent to cover Cascadia. Double click on each box to modify the coordinates. Starting on any of the four coordinates shown above, enter the coordinates in either clockwise or counter clockwise order. Notice how the fifth point automatically changes to match the first point, so there are only four coordinates to enter. When you click on the vertex’s row the associated vertex will turn blue in the map panel.

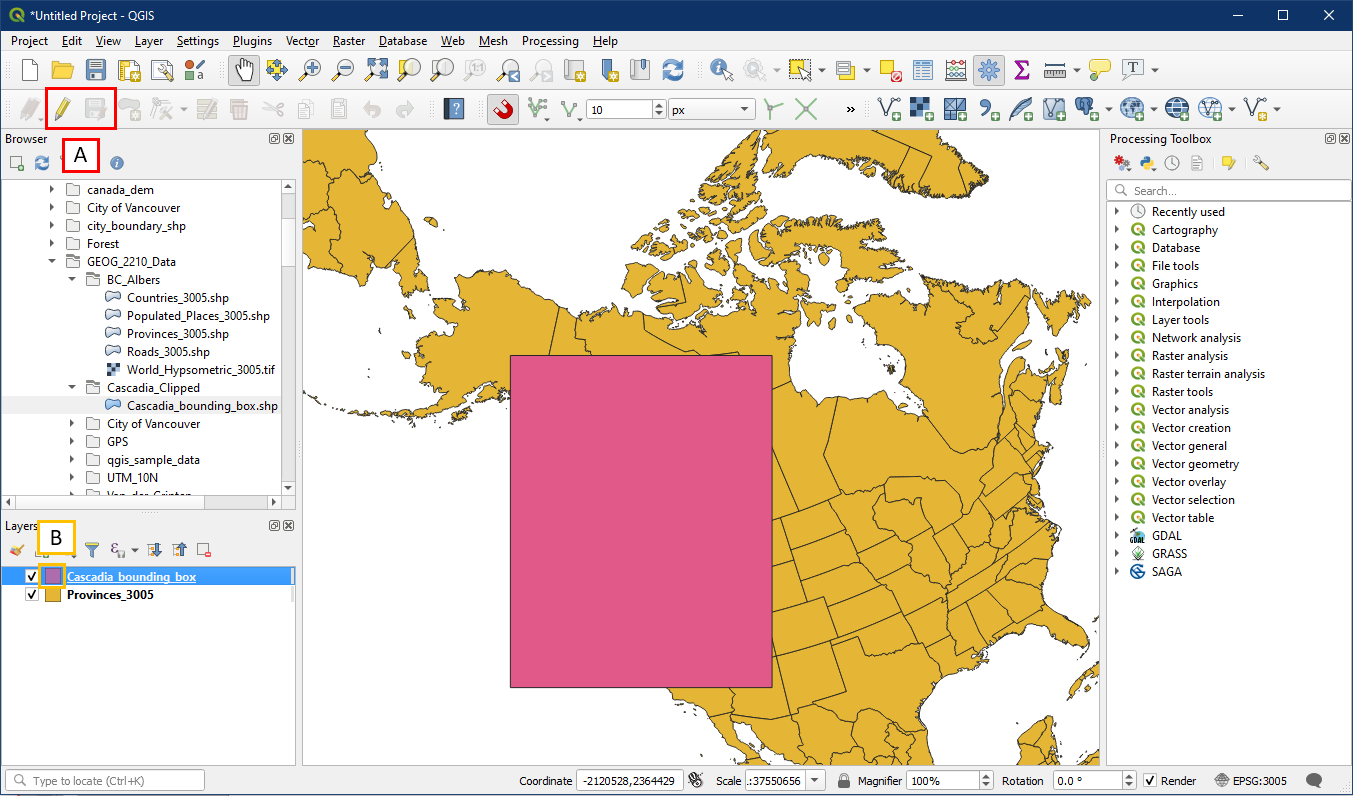
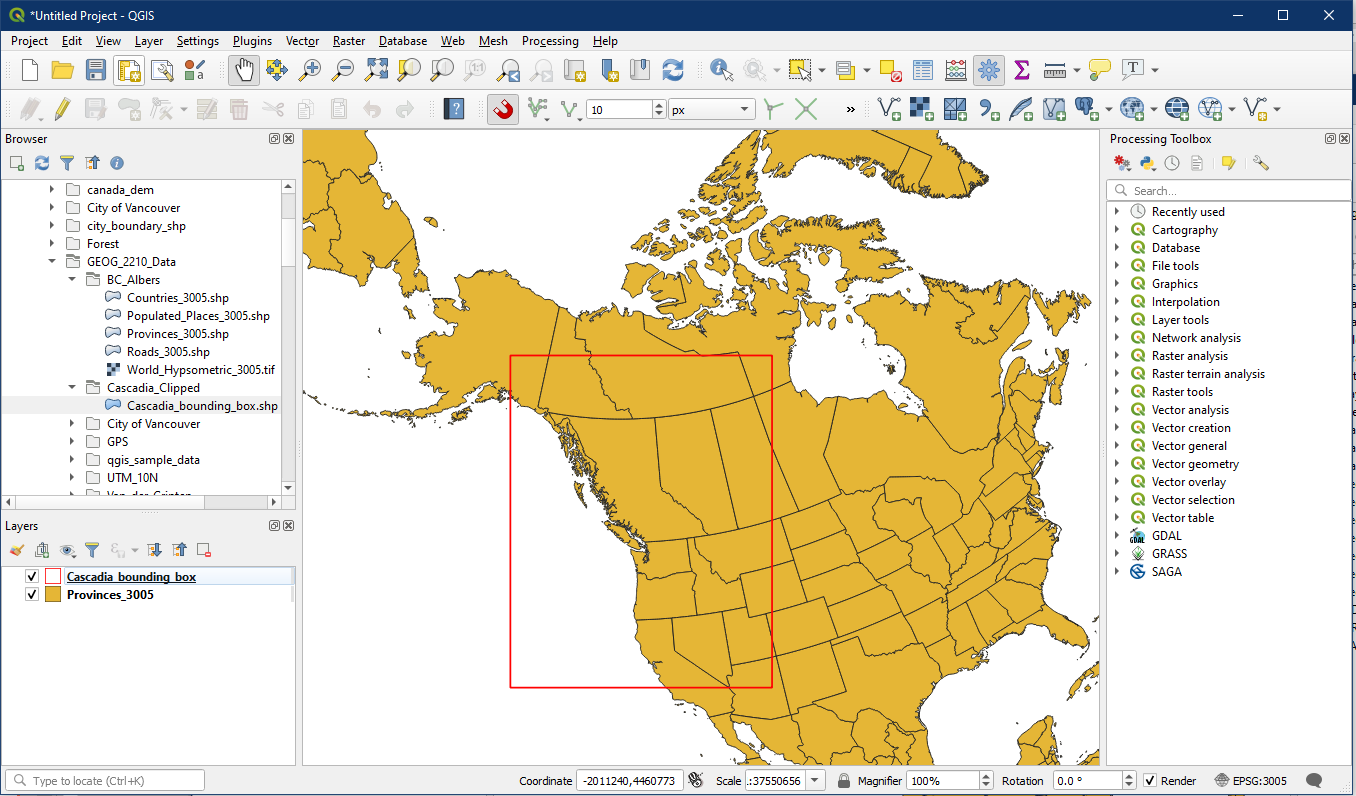
When you are done, the bounding box should look like below. Make sure to save and Toggle editing off (A). Double check that the bounding box layer is no longer being edited, no longer has the pencil icon over the symbol (B).
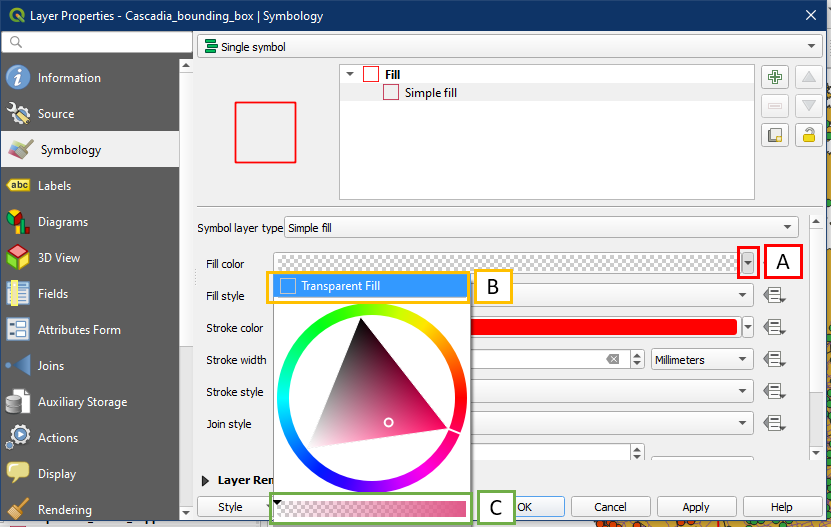
You may want to set the bounding box to have transparent fill to see what the inside looks like. In the Cascadia bounding box layer properties, click the arrow for Fill colour (A) which will allow you to either choose the Transparent Fill option (B) or use the slider to set transparency (C).
Now we can see inside the bounding box. In the next tutorial we will be clipping our world layers so that they only exist within the extent of this bounding box.
Save your project as Tutorial_14. We will use it in the following tutorials.